Healthier and Cheaper than Granola Bars.
Baked Oatmeal To Go-- Instead of granola bars! Cheaper and you know exactly what goes in them! I have to make these!
Ingredients
2 eggs
1 teaspoon vanilla extract
2 cups applesauce, unsweetened
1 banana, mashed
6 packets of Sweetleaf Stevia or 1½ teaspoons stevia powder or use ½ cup honey
5 cups, Old Fashioned rolled oats {Bob’s Red Mill}
¼ cup flaxseed meal
1 tablespoon ground cinnamon
3 teaspoon baking powder
1 teaspoon salt
2¾ cups milk
Optional toppings: raisins, walnuts, chocolate chips
Instructions
Preheat oven to 350 degrees.
Mix eggs, vanilla, applesauce, banana and Stevia together in a bowl.
Add in oats, flax, cinnamon, baking powder, salt and mix well with wet ingredients.
Finally pour in milk and combine.
Spray a 12 and 6 capacity muffin tin with cooking spray or use cupcake liners. Pour mixture evenly into muffin tin cups.
If using toppings add them onto the tops of muffins now. If using fresh or frozen fruit, drop it right into the batter.
Bake 30 minutes until a toothpick in center comes out clean.
Cool and enjoy or freeze them in gallon freezer bags.
Nutrition Info (without toppings)
Servings: 18* Calories for one: 143* Fat: 4g* Cholesterol: 25mg* Sodium: 161mg* Fiber: 4g* Sugars: 4g* Carbs: 23g* Protein: 6g*
**Gluten Free & Diabetic Friendly** Recipe Source: SugarFreeMom.com~~~~~~~~~~~~~~~~~~~~~~~~~~~~~~~~~~~~~~~~~~~~~~~~~~~~~~~~~~~~~~~~~~~~~~

Black Bean Brownies... MMmmm
Ingredients:
1 can black beans
1/2 c. cocoa
4 Tbsp. extra-virgin coconut oil
1/2 c. xylitol
2 level tsp. stevia powder
1 tsp. organic vanilla extract
3 large free range eggs
1/2 c. gluten-free flour
1/4 tsp. sea salt
http://www.draxe.com/recipe/black-bean-brownies/
Ingredients:
1 can black beans
1/2 c. cocoa
4 Tbsp. extra-virgin coconut oil
1/2 c. xylitol
2 level tsp. stevia powder
1 tsp. organic vanilla extract
3 large free range eggs
1/2 c. gluten-free flour
1/4 tsp. sea salt
http://www.draxe.com/recipe/black-bean-brownies/
~~~~~~~~~~~~~~~~~~~~~~~~~~~~~~~~~~~~~~~~~~~~~~~

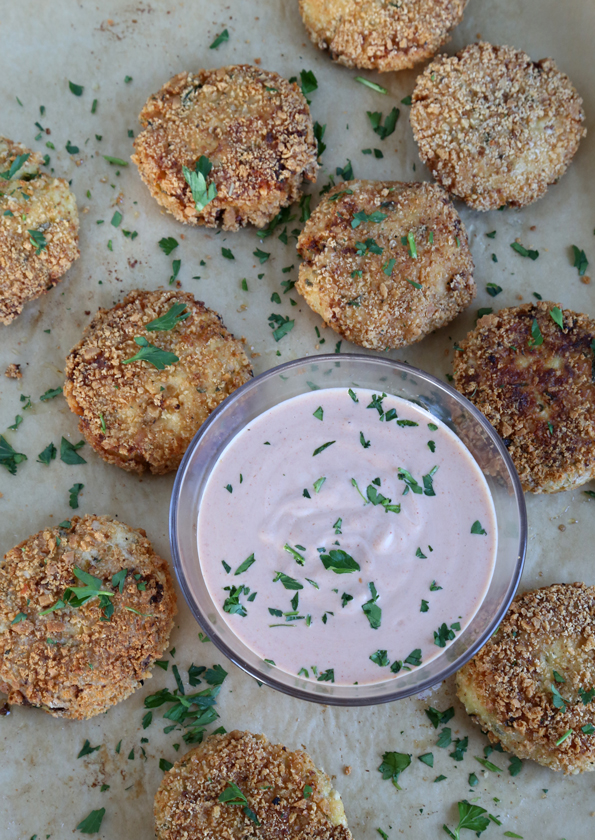
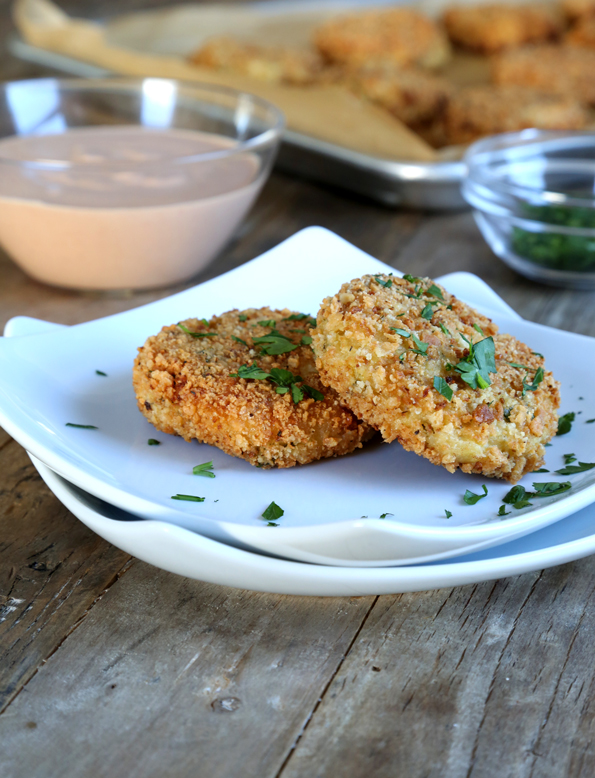
Gluten Free Cauliflower Fritters
You can use whatever dipping sauce you like. These are not spicy little fritters, so it’s nice to have a dip with some real flavor. My dipping sauce is a little something I like to call Better Than Thousand Island Dressing. (It’s the same sauce I made for those Crispy Fried Onions around Thanksgiving.)
We’ll be “ricing” some cauliflower. Stop rolling your eyes and hear me out! The whole trend of using cauliflower as “rice,” which leads directly to making cauliflower pizza, is something I resisted mightily. We’re talking major eye rolls, perhaps because I love real gluten free pizza (turn to page 186, please) so much and didn’t want to ruin it for myself or for anyone else. If I did, what would I serve for dinner to my family every Friday night?? But then I made it because well I just broke down, and if it’s too cliché to say that I see the light, then ignore me completely. But I see the light. It’s really good. I like to “rice” the cauliflower ahead of time (like, days ahead of time—I tend to do a couple heads at a time and then freeze it and defrost as needed) since it involves using a food processor and I hate that. But it’s totally food processor-worthy. And if you know me at all that is certainly saying something.
I’m not sure if it’s a super food or not, and that whole concept always seems like a bill of goods to me, but it’s delicious and it’s a vegetable and all 3 of my children (+ my husband) will eat it greedily. Score.
It dresses up a Super Bowl party, too. Which isn’t half bad.
Am I the only one who was hoping the weather for Sunday was going to be cold enough that they would change kickoff to earlier like they said they would? Probably. I’m no night owl, that’s for sure.
Ingredients
FRITTERS
1 large head raw cauliflower (to yield about 12 ounces “riced”)
3 eggs (180 g, out of shell) at room temperature
3 tablespoons chopped fresh flat-leaf parsley
1 ounce finely grated Parmigiano-Reggiano cheese
8 ounces Asiago cheese, grated (can use another semi-hard cheese)
Vegetable oil, for frying
1/3 cup (about 45 g) cornstarch
1/2 to 3/4 cup fresh Panko-style gluten free bread crumbs
DIPPING SAUCE
1/2 cup (114 g) plain yogurt
2 tablespoons mayonnaise
2 tablespoons tomato ketchup
1 tablespoon freshly-squeezed lemon juice
1/8 teaspoon kosher salt
1 teaspoon smoked Spanish paprika
Directions
- Preheat your oven to 350°F. Line a rimmed baking sheet with unbleached parchment paper and set it aside.
- First, “rice” the cauliflower. Slice all of the
florets off of the cauliflower, rinse them thoroughly, and pulse them in
a food processor until they are the texture of short-grain cooked rice.
Place the riced cauliflower in a large, microwave-safe bowl (or a
medium, heavy-bottom lidded stockpot), add about 2 tablespoons water and
cover tightly with plastic wrap (or the stockpot lid). Cook on high for
3 to 4 minutes (or over medium heat for about 5 minutes) until the
cauliflower is more tender but still firm. Uncover the bowl or stockpot,
and allow the cauliflower to cool until no longer hot to the touch.
- Transfer the cooked and riced cauliflower to a
large tea towel or cheese cloth, gather the towel or cloth tightly
around the cauliflower and wring out all of the moisture. There will be
more moisture than you expect. Keep wringing until the cauliflower is
clumped and mostly dry. Set it aside.
- To a large mixing bowl, add 2 of the 3 eggs and
beat well. Add the riced and dried cauliflower, parsley,
Parmigiano-Reggiano cheese and Asiago cheese, and mix to combine. The
mixture may seem somewhat dry, but will hold together when pressed. Roll
the cauliflower mixture into balls about 1 1/2-inches in diameter,
pressing the mixture as firmly together as possible. You should have
about 12 balls. Set up a dipping station with three flat bowls. In one
bowl, place the cornstarch. In a second, place the remaining egg, beaten
with 1 tablespoon water. In the final bowl, place the bread
crumbs. Roll each ball in the cornstarch, then the egg wash, and finally
the bread crumbs, and place it on the prepared baking sheet.*
*Make-ahead Note: The fritters can be made ahead of time up to this point, and frozen in a single layer on a baking sheet until solid, then transferred to a sealed container and kept in the freezer. Defrost overnight in the refrigerator in a single layer on a baking sheet or other flat surface before continuing with the recipe.
- Place about 1 inch of oil in a large, heavy-bottom
skillet, and place the skillet over medium-low heat. Once the oil is
rippling, press the breaded balls firmly between your palms to create a
patty about 1/2-inch thick, and place in the oil. Do not crowd the
patties in the oil. Cook for about 2 inches on each side, or until
lightly golden brown and beginning to firm up. Place each on paper
towels to drain briefly, then return to the prepared baking sheet,
placing each fritter about 1 inch from the next. Repeat with the
remaining fritters. Place the baking sheet in the center of the
preheated oven and bake for 10 minutes, or until beginning to sizzle on
the bottom. Remove from the oven, and serve after allowing them to set
for about 5 minutes.
- To make the dipping sauce, combine all of the ingredients in a medium-size bowl and whisk until smooth. Adjust the sauce to taste. The dipping sauce can be made up to 2 days ahead of time, covered and stored in the refrigerator. Serve at room temperature.
Baked Apple Chips with Cinnamon
It's healthy to make your own chips for your kids and family.
Try it this today!
Ingredients
1-2 apples
1 tsp cinnamon
Instructions
1.Preheat oven to 200 degrees.
2.Using a sharp knife or mandolin, slice apples thinly. Discard seeds. Prepare a baking sheet with parchment paper and arrange apple slices on it without overlapping. Sprinkle cinnamon over apples.
3.Bake for approximately 1 hour, then flip. Continue baking for 1-2 hours, flipping occasionally, until the apple slices are no longer moist. Store in airtight container.


No comments:
Post a Comment